One USB-C Cable at the Table for Video, USB Devices and 60W Charging
How one 2-gang wall-plate carries laptop video, USB camera and mic, and 60W charging to a distant display over a single CAT6/6A run.



HDMI wall plates are beneficial at work or home as they facilitate the connection of HDMI cables. This is done neatly and effectively, as multiple cords can easily get messy. HDMI wall plates are often found in conference rooms, professional offices, or a home theater. They offer a clean setup, as the HDMI plate can be installed directly into the wall. There are several reasons an HDMI wall plate is necessary. It may be for aesthetic appeal, managing your cables, convenience, or even improving your signal. You may ask, how to set up HDMI wall plates? Below you will find helpful information on setting up HDMI wall plates and why this can improve your home entertainment setup or professional office.
Not everyone is adept at setting up tech-related things. If this sounds familiar, you are not alone. Consider the following steps to ensure your HDMI wall plate setup is successful. However, be sure to check your HDMI wall plate kit, as each one is different. Follow their instructions and use this as a guide as you navigate the process.
You will need several tools and materials to successfully set up your HDMI wall plate. Be sure to have a screwdriver, stud finder, level, measuring tape, and utility knife. Additionally, grab your HDMI wall plate and HDMI cables. These are the essentials necessary to get your HDMI wall plate installed.
Generally, HDMI wall plates are near your television or projector for convenience purposes. When you find the general location where you want to place your HDMI wall plate, grab your stud finder. Use a stud finder to locate the studs in the wall where you want to place the HDMI wall plate. This is necessary to ensure that your wall plate stays firmly in place. Mark the area and use a level to ensure your marks are straight. Measure the distance from the floor of the marks as well.
Once you have your location set, you can cut an opening in the wall with your utility knife (or a drywall saw). It is necessary to use extreme caution as there may be electrical wires or plumbing behind the wall. If necessary, install the mounting bracket if your HDMI plate comes with one. Use screws and anchor it to ensure that it is secure and perfectly aligned. If you have any questions about the unique HDMI wall kit you purchased, contact Kanex Pro for guidance.
Once the HDMI wall plate is secure, connect the HDMI cables to the ports. They should fit perfectly into the ports. Attach the wall plate over the opening and secure it in place. Tighten any screws to ensure that everything is secure. Once you have done this, test the connections to ensure that the HDMI wall plate is up and running.
An HDMI wall plate offers several benefits. If you are dealing with any of the following issues, consider installing one.
Whether you have a bunch of cables at home or work, they can be unsightly. Install an HDMI wall plate to achieve an organized and put-together place.
Having an HDMI wall plate near your mounted devices, especially a TV, can be beneficial. It can easily conceal the connection between your display and other connected devices.
Cables can easily become tangled and create a mess. Avoid this by installing an HDMI wall plate. This can help you easily manage your cables. This is especially helpful in home entertainment centers with multiple devices.
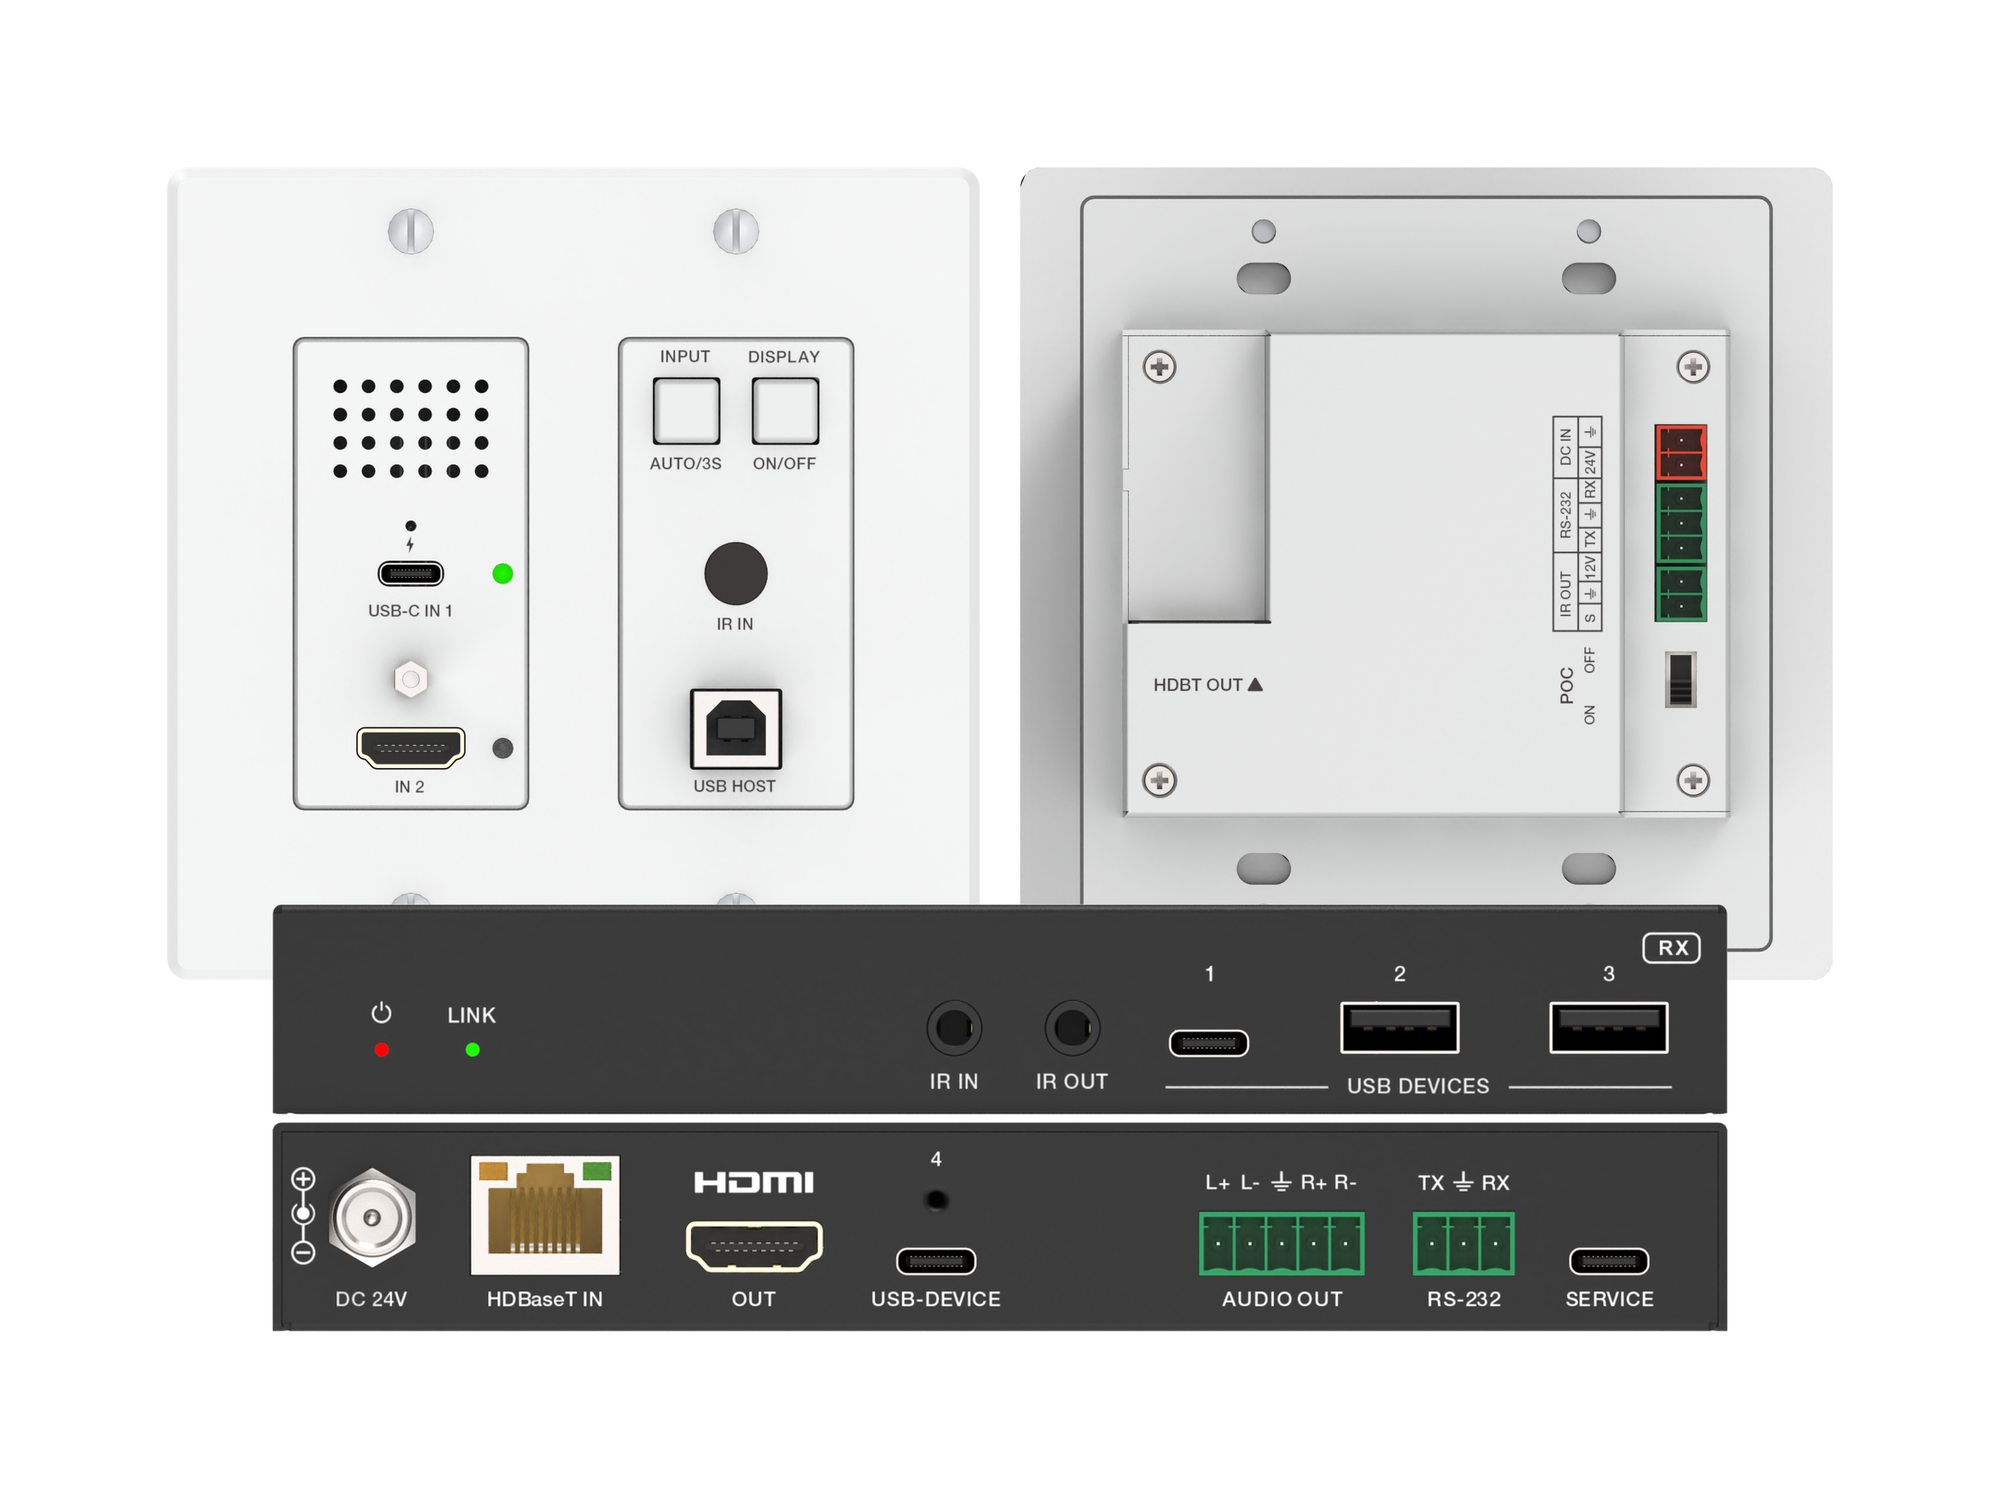
How one 2-gang wall-plate carries laptop video, USB camera and mic, and 60W charging to a distant display over a single CAT6/6A run.
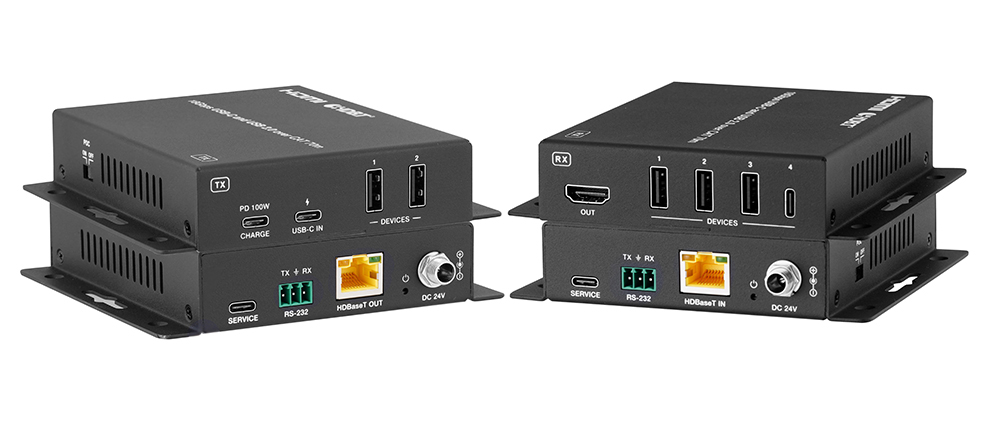
A BYOD room gets designed around the display, the room camera, and the network — and then the actual connection between the laptop and all of it is…
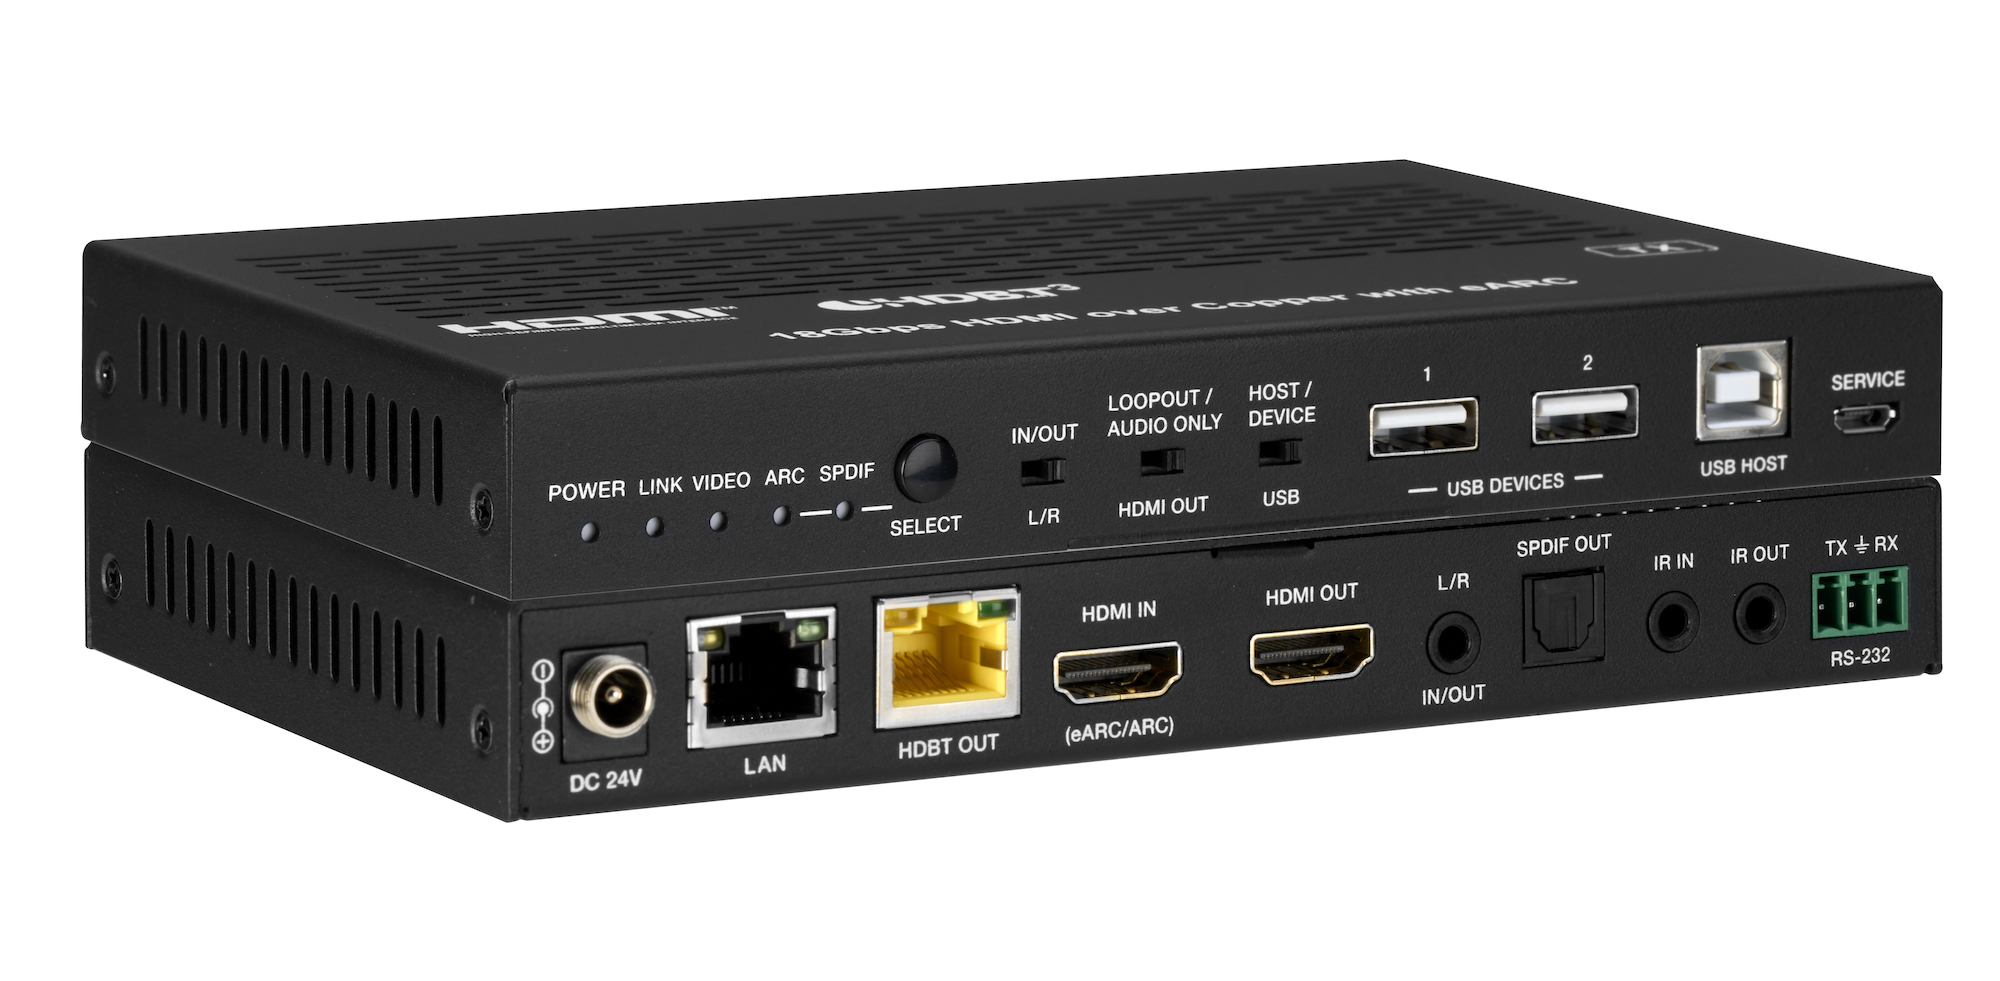
How the EXT-HDBT3ARC-TX carries 4K60 video out to the display and brings eARC audio back down the same CAT6A cable, with USB 2.0, Gigabit Ethernet…
KanexPro sells direct to dealers, resellers, installers and integrators, and through distribution. Whichever way you buy, the same engineers answer the phone.
The trade store: your own account, live stock, reordering, and a first look at new products.
Go to the trade store →Distribution and authorised resellers across the US and beyond.
See where to buy →Design help on extenders, matrix and AV over IP before you spec it.
Ask an engineer →